Understanding the Importance of a Starlink Roof Mount
The connectivity landscape has evolved significantly with the advent of satellite internet services. One standout participant in this market is Starlink, which offers high-speed internet across various terrains and conditions. Central to the efficient operation of a Starlink system is the starlink roof mount. This infrastructure is crucial for ensuring optimal reception from satellites, greatly affecting the performance and reliability of the internet service.
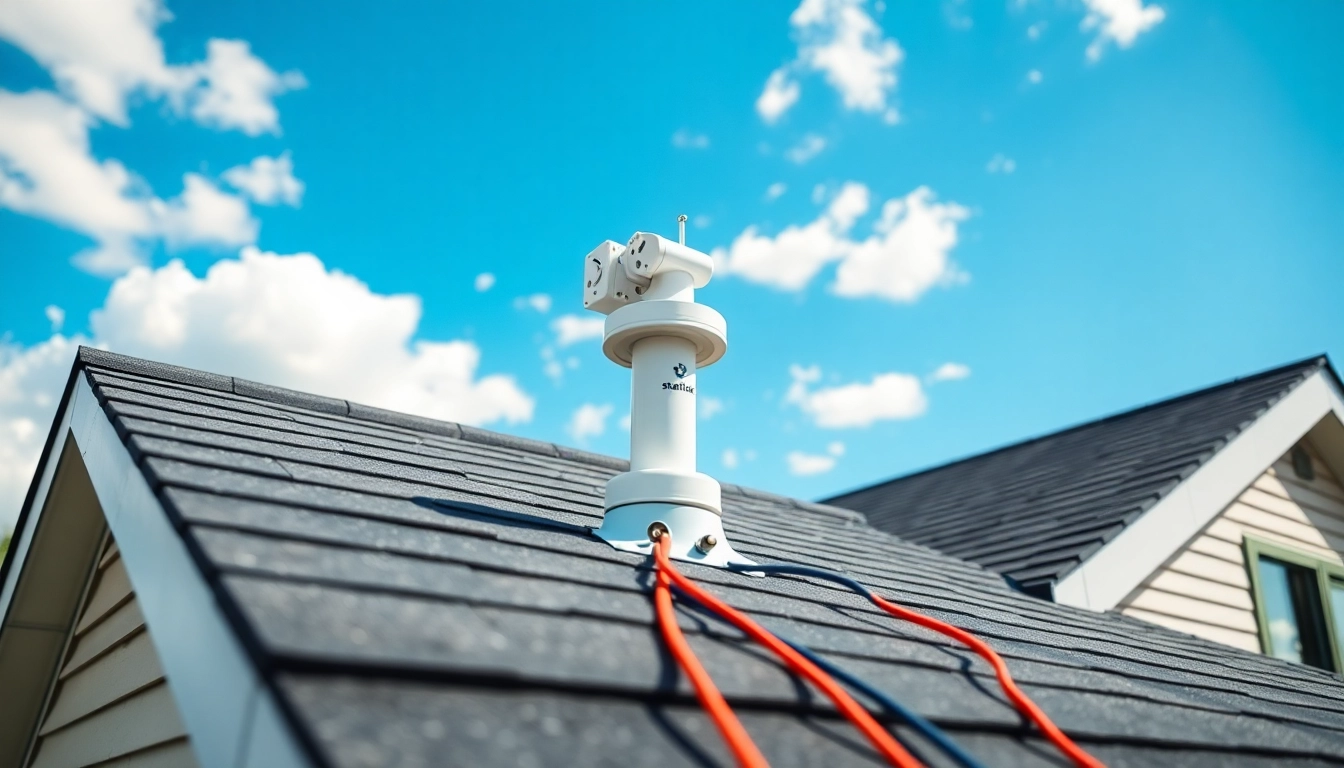
What is a Starlink Roof Mount?
A Starlink roof mount is a specialized mounting system designed to securely hold a Starlink dish in place, typically on the roof of a building. This mount is engineered to withstand various environmental factors, such as wind, rain, and snow, thereby providing a stable platform for the dish to capture signals from orbiting satellites. Without a proper mount, the dish may be susceptible to signal interference, resulting in decreased internet speeds and inconsistent connectivity.
Why Choose a Roof Mount?
Using a roof mount for your Starlink dish offers numerous benefits:
- Optimal Signal Reception: Roof mounts elevate the dish above common obstructions like trees and buildings, improving the line of sight to the satellites.
- Protection from Elements: Mounted dishes are less exposed to possible damage from ground-level activities or animals.
- Permanent Installation: A roof mount provides a stable, long-term setup that minimizes the need for frequent adjustments and maintenance.
Common Installation Challenges
While installing a Starlink roof mount presents various advantages, it also comes with its own set of challenges. These can include:
- Compatibility Issues: Not all roofs can accommodate all types of mounts; understanding your roof structure is key.
- Weather Considerations: Installing during inclement weather can complicate the process, making it necessary to plan installations accordingly.
- Proper Alignment: Achieving the right angle and orientation is crucial for optimal satellite connection; misalignment can lead to performance issues.
Choosing the Right Location for Your Starlink Roof Mount
Factors to Consider for Optimal Reception
To ensure your Starlink dish operates effectively, consider the following factors when selecting a location:
- Obstruction Clearance: The mounting location should provide an unobstructed view of the sky, particularly towards the satellite’s orbit path.
- Access to Power Supply: Ensure proximity to a power source for the dish’s operation, avoiding long cable runs that can reduce signal quality.
- Ease of Maintenance: Choose a spot that allows easy access for maintenance and cleaning, as dirt and debris can significantly impact performance.
Assessing Your Roof Type and Angle
Your roof type and angle can greatly affect the best mounting strategies. For instance:
- Flat Roofs: These typically require a specific type of mount that offers stability without penetrating the roof surface.
- Pitched Roofs: On sloping roofs, adjustable mounts can help with proper alignment and reduce the risk of slippage.
Environmental Considerations
When deciding where to install a Starlink roof mount, consider your local environmental conditions. High wind areas may require sturdier mounts, while regions that experience heavy snowfall might necessitate mounts designed to handle snow weight without collapsing.
Installation Tips for Your Starlink Roof Mount
Materials Needed for Installation
Before beginning your installation, gather the following materials:
- Starlink roof mount kit
- Drill with appropriate bit sizes
- Wrenches and screwdrivers
- Safety harness (if installing on a high roof)
- Weather-resistant sealant
Step-by-Step Installation Guide
Follow these steps for the best installation experience:
- Identify the optimal location on your roof based on previous considerations.
- Mark the spots where you will be drilling into the roof for the mounting brackets.
- Use a drill to make holes for the mounting screws and insert anchors as needed.
- Secure the mounting brackets in place using the appropriate screws.
- Attach the Starlink dish to the mount, ensuring it is oriented towards the southern sky (in the northern hemisphere) for optimal satellite connection.
- Double-check for level alignment and adjust as necessary.
- Apply weather-resistant sealant around the screws to prevent water infiltration.
- Connect the cable from the dish to the power source inside your building.
Safety Precautions During Installation
Prior to installation, take necessary safety precautions:
- Always use a safety harness if working on a tall roof.
- Ensure you have a helper if possible to hold equipment or assist with stable positioning.
- Beware of electrical lines, and avoid working in wet conditions to minimize slips.
Maintaining Your Starlink Roof Mount
Regular Checks and Maintenance Schedule
Like any technical installation, periodic maintenance is essential:
- Inspect the mount every 6 months for signs of rust, corrosion, or physical damage.
- Check the integrity of the seals around screws and connections to ensure they are secure and weather-tight.
- Clean the dish surface regularly to prevent dirt accumulation, which can block signals.
Common Issues and Solutions
Several issues may arise with your Starlink roof mount:
- Poor Signal Strength: Check for obstructions or misalignment of the dish; realignment may be necessary.
- Physical Damage: Inspect for cracks or stress points; consider replacing damaged mounts immediately.
When to Call a Professional
If you encounter serious structural issues with the roof or are unsure about making necessary adjustments, consulting a professional installer is advisable. This can prevent costly errors and ensure your system remains operational.
Upgrading and Expanding Your Starlink Setup
Adding More Access Points
If your home is large or has unique layouts, adding more access points can be beneficial for improving coverage. This may involve installing additional Starlink dishes or range extenders that complement your existing setup.
Integrating with Smart Home Systems
Consider integrating your Starlink system with smart home devices. This could involve connecting your Starlink internet with smart hubs or additional network gear to maximize performance in a connected home environment.
Future-Proofing Your Setup
Consider potential upgrades or expansions when installing your system to ensure longevity. This may include more robust cables, higher capacity routers, or additional satellites as technology evolves.